Make an Easy Scarf

Ushya scarf headshotSometimes it’s nice to work on a knitting project that’s easy. It can give you something to do after a hard day. Or it lets you pick up and keep working, even if your project’s been neglected for a few days, without having to struggle to remember what you were doing.

And it’s often the case that an easy project gets you something fast!

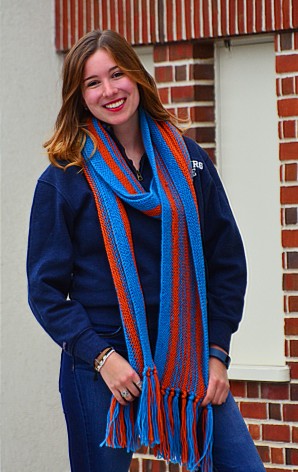
This morning, just in time for a Pennsylvania 25-degree day, I finished a seed-stitch scarf. I’m using a lovely yarn from Mirasol called Ushya. It’s super bulky but light as air. Its chainette construction is the secret for making it feel like wearing a feather. Look at this yarn up close, and you can see that it’s braided instead of twisted:

Ushya yarn photo

My pattern was simple: Cast on 17 stitches using a U.S. size 15 (or 13 or 17 depending on how you knit) needle. With the yarn in front, slip the first stitch purlwise (I have a video for how to do this here). Bring the yarn to the back over the needle (as if going from purling to knitting), and now begin to knit 1, purl 1 across the scarf. When you get to the last two stitches, knit each of them. That’s it. Repeat the same thing on every row.

When the scarf is your preferred length, bind it off. I used two hanks of yarn for my project. My scarf is a generous 7″ wide, and I worked until the yarn ran out, which was at about 5 1/2 feet. (The scarf was at this point taller than I am, so that seemed like an excellent stopping place.)

You may use any yarn you like and any width you like; just cast on an odd number of stitches. You don’t need to swatch this one: If, after an inch, you see that your scarf is too wide or too narrow, rip it out and adjust accordingly. (And no knitter’s denial allowed; an inch isn’t that much work!) Your nice local-yarn-shop owner will be happy to help you with how much yardage you’ll need for the type of yarn you’ve chosen.

Winter has at least another month here in Pennsylvania, and it’s nice to have a scarf that I can wrap around my neck to keep nice and warm.

Gift-Along

Until Tuesday, November 28 (which is rapidly approaching), there are thousands of patterns at 25% off on Ravelry through the annual Indie Designer Gift-Along on Ravelry. I have looked through them all, with the idea of making a few of them. I wanted to show you some of my favorites. (For the last few days, I have been planning to add pictures for each one, but work has been busy and the sale ends tomorrow, and I’m getting worried that this won’t happen at all, so I’ll let you click on links, and you can look at the pictures on Ravelry. It’ll be like a treasure hunt.)

I chose patterns that for the most part would be quick to make, and that had something that interested me, such as a cool design feature. I left out many stunning patterns, but when there are over 3,000 choices, you have to narrow it down somehow.

Hats

There are 5 hats that I particularly loved. The first, the All Ribbed Up hat, is quick and easy. I loved the creative use of ribbing. And it’s pretty, too!

https://www.ravelry.com/patterns/library/all-ribbed-up-hat

I’m a bird person, and the Passerine hat is one that I’ve been looking at ever since it came out. It’s so pretty! There is no way I’d have time to make it by Christmas, but if it’s for me… well… there’s time.

https://www.ravelry.com/patterns/library/passerine-hat

Okay! Back to gift-giving! The messy-bun hat is out there in many versions, but I thought this one had a nice little detail on the side:

https://www.ravelry.com/patterns/library/catalina-messy-bun-hat

This hat is completely intriguing, and I absolutely love the name:

https://www.ravelry.com/patterns/library/splat-hat

And finally, I have no idea who I’d give this to, but it is so stinkin’ cute I can hardly stand it.

https://www.ravelry.com/patterns/library/bunny-ears-hat-3

Cowls

Let’s look now to cowls, always a classic gift. This one is pretty:

https://www.ravelry.com/patterns/library/silver-falls-cowl

I’ve always loved Katy’s designs. Her Compulsive Cowl is no exception, and it does look as if I would be compulsive about knitting it (although admittedly, this is not exactly unusual knitting behavior):

https://www.ravelry.com/patterns/library/compulsive-cowl

And this one looks like lots of fun (I’m guessing that you have some hand-dyed yarn sitting around):

https://www.ravelry.com/patterns/library/davinci-cowl

Mitts

I love these mitts!

https://www.ravelry.com/patterns/library/hot-cross-mitts

And these have welts, which I would definitely be swooning over if I were the swooning type (what I lack in drama, I make up for in practicality):

https://www.ravelry.com/patterns/library/world-war-gloves

Jewelry

I don’t crochet super-often, but I’m thinking about it with this pretty bracelet. It would go quickly:

https://www.ravelry.com/patterns/library/slap-chop

If you don’t crochet but like jewelry, this necklace is soooooo pretty! It’s almost a collar.

https://www.ravelry.com/patterns/library/saqqara-necklace

3-D Projects

If you want to make items that are more sculptural, here are a few ideas:

Tulips!

https://www.ravelry.com/patterns/library/spring-tulip-pattern

Gnomes! They. Are. So. Cute.

https://www.ravelry.com/patterns/library/never-not-gnoming

Feet

Like to make feet and leg things? Here are a couple of ideas that would be quicker than socks:

Slippers: https://www.ravelry.com/patterns/library/dinar

Sometimes I think I should make myself boot cuffs. I’ve never quite understood them, but they are popular enough that I have the feeling they might be useful. Have you ever made them? What do you think? Do you wear them?

Boot cuffs: https://www.ravelry.com/patterns/library/entangled-boot-cuffs

Shawl

I almost didn’t include any shawls, even though there were so many beautiful ones, because a shawl would take pretty long for a gift, but this one is graphically amazing. (See above about the Passerine hat plot.)

https://www.ravelry.com/patterns/library/cascadian-2

For the Home

Baskets are useful for anyone!

https://www.ravelry.com/patterns/library/poldi-basket

Sadly, we are almost at the end. (I don’t know about you, but I’m glad that knitting patterns never really end.) And this final one for today is a simple, excellent idea. It would go fast, and it’s very, very pretty, and you get to buy fancy soap and decide on just the right scent:

https://www.ravelry.com/patterns/library/bubbly-scrubber

Have fun looking at all the gift-along items! You might find even more. Check out the group on Ravelry: https://www.ravelry.com/groups/indie-design-gift-a-long.

Even if you have read this too late and miss out on the sale, it’s not that big a deal, given the joy you get from knitting for the still-small price of a pattern. (Best of all, paying designers keeps them working for you. And eating. And buying yarn.)

There are all kinds of Gift-Along events happening throughout December. So plunge in wherever you are!


2107 Gift-Along

Bow for Giftalong

Every year at this time, independent knitwear designers on Ravelry get together to do a gift-along. It’s a month of knitting and chatter about knitting, with the aim of getting a few holiday gifts both started and finished. If you knit (or crochet), you’ll particularly enjoy spending the entire month along with lots of other like-minded friends.

This year’s gift-along starts November 21 at 8:00 p.m. If you’re on Ravelry, go to this group to join in on the fun!

Yup. I’ll be participating. We designers were all limited to between 10-20 patterns. For my part, I tried to pull patterns that you could make as a gift (during the actual year of 2017).

See you there!

Fleece Navidad

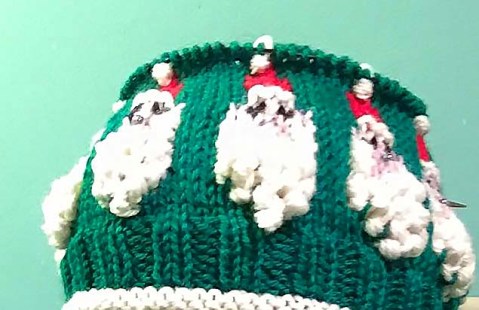
While Pinterest surfing this fall, looking for ideas for a Christmas-hat design, I ran across a Santa that had a beard made from cotton balls. This put an idea in my head: I could create Santas with puffy beards in a Fair-Isle knitted hat.

I figured out a way to do this, and got to work.

Now, I admit that I don’t swatch as much as I should. I know my gauge from so many years of experience, and most of the time I can visualize what’s going to happen.

It seemed to be going well at first. Santa start


Did you catch the foreshadowing? Yes, things went …. well … this eventually happened:

Santa start II

I would normally apologize at this point for the bad picture, but to be honest, a good picture would not have made this Santa hat look any better. It was the knitting equivalent of Cake Wrecks.

An encouraging consultant-friend suggested that perhaps the Santas could become sheep. That appealed to my woolly nature and seemed like a good possibility.

I started again. I don’t have photographic evidence, but let’s just say that the sheep didn’t work out with all those cotton balls, even though they should have. They were getting too puffy.

To avoid bursting into tears, I decided to forget the whole cotton-ball idea and just make safe, regular Fair-Isle sheep.

But all was not lost with my cotton balls! As I was working the sheep, I had the flash of insight that I could use my idea to make pom poms at the top of their hats.

Pear sheep

Triumph!

But there were a couple of things that still bugged me: (1) The sheep were a little too pear-shaped. I had pictured cotton balls, and as much as a number of consultant friends said that the sheep looked perfectly okay in this shape, I could not let go of my rounded-cotton image, and (2) I wanted Santa sheep. These were elf sheep. Their hats were the wrong color.

I ripped out the whole hat again. I reknit it with red ribbing and a green background, and tweaked the sheep shape. (Say that 10 times fast.)

And much to my relief, it all worked.

I added a white pom pom to the top, so that the wearer would look just like a sheep, and then it was time to get the real photo.

Ella 5 edited copy CAS

The model asked her mom to make her one. This is the acid test of any pattern.

Want the pattern? Head over to Ravelry. (If you have a local yarn shop, buy the pattern there via Ravelry’s in-store sales, and get the yarn from them as well. Shop local to keep all our cute little yarn shops around!)

My Own Myluna Cowl

One evening at dinner during a wholesale yarn market, my sweet friend Myra, who owns Woolbearers, was talking to me about ideas for her shop. And a few weeks later, I received yarn in the mail from her. I couldn’t remember why I was supposed to get this particular yarn (although having more yarn in and of itself isn’t an unusual event in my life), so I squirmed a bit, was unable to remember, and finally broke down and asked Myra why she had sent it. She said in a patient voice that I had told her I would design something out of it.

Huh.

Although I had only a vague memory of that agreement in our conversation (I blame yarn fumes), I always keep my word. And so I started working on it. Myra asked for a cowl. (Or at least, that’s what my memory was, and if she did want a hat or mitts, she was too polite to correct me after the cowl was finished.)

I started looking at stitch dictionaries and ran across something that looked sort of interesting. But it was far too difficult for a brain that couldn’t even remember an impending yarn delivery.

I started playing with that pattern to make it way easier. The result was the Myluna cowl, which only looks tricky:

Myluna web

I named it after Myra (the “My”) and me (“Cynthia” means goddess of the moon–or “luna”–and also is kind of short for “lunatic” on some days), and took a photo for the pattern, and then sent the cowl off to Myra for her shop.

The pattern was easy and fun to make. I made sure to write out everything line by line, and put a space for tick marks after each round’s instruction.

And then I wanted my own. I loved the tonal hand-dyed look of the original, so I scouted around at Stitch Your Art Out and decided on Euro Yarns Huasco in a gorgeous apple green. I worked on and off for about a year in between other projects, and because of my instructions, I never got lost. Last night I sat down to work on it, and suddenly realized I had 4 rounds and would be finished–so what started as a relaxing evening of knitting became a rush to finish before bedtime. And I triumphed!

The pattern has flexible sizing, and I had enough yarn for three repeats of the pattern rather than the original photo’s cowl, which had two. Sometime I want to make it about 24″ around with lots of repeats. Yum.

Do you want it too? That’s easy! You can get it at Ravelry (or much better, go to your local yarn shop, have them get it for you via in-store sales, and please do buy yarn from them for it while you’re there).

Isn’t my new one pretty? I’m glad the weather has gotten cold!

Big Lessons to Make Knitting Go Well: Lesson 3 (Mistakes)

Mistake mittenI’ve learned from knitting that mistakes are part of knitting. There are times when you’re tired and skip an instruction, or your gauge is off, or you use the wrong yarn for the project, or the dog eats your knitting… The list goes on. The question is, what do you do about these problems? Here are a few tips.

Avoid mistakes in the first place. If you can, find out where the pitfalls may be with your pattern. You can do this in several ways: My personal favorite is to take a class, where the teacher has already knitted the pattern. You can also knit with a friend who has already knitted it. Or you can look on Ravelry to see what others say about knitting it. “Read the comments on the pattern, and take them to heart,” says Susan Wilcox of Oregon Knitting Company in McMinnville, Oregon. Agrees Rosemary Libby of Rosemary’s Gift and Yarn Shop in Windham, Maine: “Take the time to check for errata before starting the pattern; it can save you a lot of time in the end.” (Of course my main goal for Really Clear Designs is never to have even one comment about a problem with clarity! But I’m human, and it could happen. So check!)

Catch those mistakes ASAP when you do make them. Ann Miner, of Yarn Folk in Ellensburg, WA, wisely says, “The two things that will improve the quality of your work the most are learning to read your stitches on the needle and in the fabric, and examining your project every few rows.”

I agree 100 percent with Ann! I remember learning to knit, and sitting at the dining-room table making my first garment: the ugliest vest in the world. (Two rectangles = Not flattering.) As I worked on it, I looked at the stitches that were on my needle and below my needle, just to see how stitches sit on the needles (right side of the stitch to the front!), and to learn how to repair the mistakes I did make. Today, it is second nature. Then, it was learning. And the time I spent was so worth it.

Never ignore Knitter’s Denial. You know what this is. (Or at least your “friends” do.) It’s that sweater that you’re knitting for your kid that will actually fit your husband, or vice versa. It’s that hat that is supposed to hug the head but falls off at the slightest movement. It’s the top-down mittens with the strange, pointy tip. It’s the socks that are so thin and long that they would make a good snake warmer. You’ll look at the odd object in question, and you’ll hear that familiar voice: “That does look maybe a little off, but I don’t want to rip. I’ll keep going. It’ll be fine.” It probably won’t. (That said, I’ve also seen knitters rip out things that were perfectly good. Before you rip, do take a bit of a cooling-off period, and perhaps get a second opinion.)

Learn how to take out your knitting. Sometimes you need to take the needles out and rip back many rows. Other times it’s better to take out one stitch at a time. Consider before you begin either route which will be the faster and less dangerous. Your decision for what to do hinges on that cost/benefit analysis. It might help you to know that I have a short video on Youtube to describe how to correct a few common mistakes.

Fix the mistake—and then re-knit right away! Don’t let a mistake languish. Get it fixed as soon as possible so you can move forward. Get help if you don’t know how to fix it. Your local yarn shop will help show you the way. (Final tip of the day: Be sure to use their yarn for your projects so they are familiar with your project and able to help you. And best of all, it will also keep them there for you!)

Big Lessons to Make Knitting Go Well: Lesson 2

The second big lesson I’ve learned from knitting is to make check-off charts. Whenever I start a new pattern, I create a sheet so that I can check off sleeve shaping, top-of-hat shaping, cabled rows, and so forth. The sheet might be in the form of words, or it might be a chart (whatever seems easier for that project). Sometimes I have one written-out line for every row I knit. Other times (in the case of sleeve increases, for example) I have a series of little boxes that I can check off.

It doesn’t have to be fancy. Here is a chart that shows a sleeve increase every 4 rows 4 times, then every 6 rows 3 times:

chart

So that I don’t have to write this out or copy it (yes, I’m that lazy), I would make a right-diagonal slash as I finish each row for one sleeve, and a left-diagonal slash for the other sleeve.

If you make a check-off sheet, keep it with your knitting project (and keep a pen in the bag too). When you pick up the bag again for that particular project, your checks show you where you were when you stopped working on it during that period from April to November last year when the basement flooded, you were promoted unexpectedly at work and had to sell the house, and then your sister had a baby.

Or maybe just when you started all those other projects that seemed like a good idea at the time instead of this one. As Deb Kerr, of Potomac Bead Company in Alexandria, MN, says, “One of my big lessons is that I have given myself permission to start a new project without completing the 10 WIPs. By leaving a WIP aside for some time, coming back to it is just like starting a new project!”

The cool thing about check-off charts is that you get the joy of the restart without the usual regrouping.

I build check-off sheets right into many of my patterns for just this reason. I know I’m going to do it for myself anyway, so I might as well do it for all of us while I’m at it.

Myluna webOne of my patterns, the Myluna cowl, for example, has different things going on for most rounds.


The check-off sheet starts like this:

Myluna chart

I alternated the gray and white rows throughout the table so the sections are easier to distinguish. To make seeing a row even easier still, you can also use a higher tape or magnet board. I left a blank column on the far right for the tick marks.

If you have a pattern that is repeated (row 4 is like row 1), you can even type out the whole pattern, and copy/paste those rows so that you’re not having to jump around on the page as you work. (Just be sure to proofread!) This seems like a lot of extra work, but depending on the amount of jumping around you need to do, it can actually save amazing amounts of time.

If your project is large, such as a sweater, you might want to divide your check-off sheet in small sections, creating it as you work (such as body shaping, then after the body is knit, the armhole shaping). That way you’re not overwhelmed writing so much out all at once.

In the end, we all want to get to the knitting as soon as possible. The check-off sheet takes a little upfront work, but allows you to knit contentedly after that for long periods of time without having to try to figure out where you are in the pattern.

Save

Big Lessons to Make Knitting Go Well: Lesson 1.

One day I was a kid, looking longingly at colorful mohair and wool yarns in a store. What seemed like the next day, I was in my early 20s finally picking up yarn and needles to learn knitting. And what seemed like only a day after that, I was almost [muffled sound] years old, still working every day with the yarn and needles.

In this blog over the next few entries, I’m going to talk here about the Big Lessons I’ve learned from so much experience. And now and then, I’ll bring in some local-yarn-shop-owner friends to help tell the tales.

I have a sign (a classic find at a Cracker Barrel from a few years ago) that says, “There are no mistakes, only lessons.” Let’s just say there have been lots of “lessons” in my knitting life. Today is Lesson 1. I won’t even say the word for fear you will run away screaming. (No knitter ever wants to hear the G-word.)

*****

I have worked with hundreds of knitters, and their gauges (note that I am whispering the word in a soothing, purple color) can be astonishingly different. Put just 20 knitters in a room, give them all the same yarn and needles, tell them to cast on 20 stitches—and the difference between the smallest and largest swatch is likely to be about 2″. If you cast on more than 20 stitches, gauge can make a huge difference. (Think baby blanket vs. grownup afghan. Think yarn shortage and no more left in that dyelot.)

Gauge is the number of stitches per inch you get when you knit. The idea is to get the same number of stitches per inch that the pattern designer got. This can be easier said than done, and sometimes it’s not your fault if it doesn’t work out as planned.

final scarf photoAuthentic Designer Confession: Once upon a time, there was a “School-Spirit Scarf,” which I designed and knit while walking around Disney for a week. The scarf seemed to be taking an inordinate amount of yarn to make, but it was being worked during a bit of “knitter’s denial” on account of “Disney fog.” At the halfway point, when I had a sudden realization that this would be a very long scarf, I didn’t want to (or was too stubborn to) start over. It is indeed a very long scarf, and the description for the pattern conveniently reflects how much more school spirit you show when you wear an extra-long scarf.


Designers can have just as varied gauges as everyone else, and as a result, I have seen patterns that seem to have unusual needle sizes for the yarn that’s being used. Just the other night, I was helping someone with a sweater pattern that had a gauge of 21 stitches over 4 inches on a size 5 needle using worsted-weight yarn (which normally knits at about that gauge on a needle 2 sizes larger). This designer was probably a “loose knitter,” who needed to go down in needle size to get the gauge she wanted. If a tighter knitter were to blindly pick up a size 5 needle and not knit a gauge swatch, the sweater could turn out to be quite small. That’s a lot of lost work.

You know the drill: If your swatch is too big, choose a smaller needle. If it’s too small, go up. The thing is, if you check gauge regularly, you’ll know whether you’re a loose or tight knitter, and you’ll know almost exactly how loose or tight you are, and your swatches will be spot on most of the time on the first try. It gets easier.

Before starting any pattern, I always double-check the designer’s gauge-math too. Most of the time it’s correct, but if it’s not correct, I like catching it before starting to knit. Here’s how to do this. For example, if you’re knitting a sweater that is supposed to be 40″ around, and your gauge is 5 stitches per inch, and you’re casting on from the bottom in the round, you should probably have somewhere around 5 x 40 or 200 stitches to cast on. (Gauge is also a bit of an art form, and it may vary slightly for a number of reasons. If the ribbing is started on fewer stitches, you’ll have to look for that 200 stitches after the ribbing in the main body of the sweater. If there’s a lace or cable pattern, the designer likely subtracted or added stitches to compensate for those designs. But you get the idea.)

Lots of mistakes can happen in patterns between idea and execution. We’re all human. The important part is to build awareness so that you can track what’s happening as you knit.

P.S. After all of this, gauge will lie. The swatch is only a starting place. You’re probably going to try to be a “good knitter” when you start, but as you work, you’ll probably loosen up (or might even tighten up, if that meeting got tense). Be sure always to double-check your measurements as you go.


The Elements of Knitting

I taught writing at a university for 20 years. During that time, I used as my main textbook Strunk and White’s Elements of Style. The words from that book (along with E. B. White’s gorgeous book, Charlotte’s Web) run deep in my blood.

My favorite quote was about being concise. Perhaps you’ve heard it:

“Vigorous writing is concise. A sentence should contain no unnecessary words, a paragraph no unnecessary sentences, for the same reason that a drawing should have no unnecessary lines and a machine no unnecessary parts.”

That’s usually where people stop. But keep reading:

“This requires not that the writer make all his sentences short, or that he avoid all detail and treat his subjects only in outline, but that every word tell.”

People often mix up “short” with “concise.”

Why am I talking about this on a knitting blog? Because my patterns are sometimes long. My record (so far) is the College Avenue sweater, which runs 16 pages. I probably could have made it 4. I never, however, sacrifice explanation for pattern length in one of my how-to patterns. It’s one of my immutable laws.

final college ave lower res

College Avenue tells you how to get gauge, how to knit seamlessly (which I advise against but explain anyway!), how to read cable charts, how to get your sweater body to fit,  how to get your sleeves to fit, how to decide on your length. It gives directions for making the left and the right fronts separately, so you don’t have to think about “mirroring” them. It gives a clever way to Kitchener the sleeves to the body, so you don’t get those pesky holes on each end of the Kitchenering. It gives you the choice of binding off or short-row shaping the neckline. It gives tips for spacing buttonholes.

All of this takes space to explain, and I’m happy to use more space when it increases clarity.

Along with the “designs” part, I want my patterns to be “really clear.”